27 Apr

Why Moisture is the #1 Enemy to Your ESD Flooring

#1 Enemy of ESD Flooring

It’s hard to walk down a sidewalk these days without seeing a crack in the pavement. Some of these have obvious reasons, like strong tree roots pushing them up, while others seem to appear out of nowhere.

When concrete is initially poured on a flat surface, to create a floor or sidewalk, it is left for a day or more, depending on the location, to cure. Curing is the process by which the concrete is protected from evaporation until it hardens.

The wetter and cooler concrete is while it’s curing, the stronger and less permeable it is.

I know what you’re thinking… Wait. Why does this matter to ESD flooring? The short answer is more than you know.

A Concrete Problem

Because of the unique nature of the concrete curing, moisture is captured within the concrete. Again, this helps the concrete stay stronger and last longer. But it has an unfortunate side effect.

You see, concrete cracks when the moisture inside it evaporates faster than it can draw replacement moisture from the ground under it.

You may have noticed that a bare concrete floor is unusually cooler than its surroundings.  There’s even the old wives tale about walking on bare concrete causing arthritis flare-ups.

But concrete doesn’t just capture moisture during curing. After hardening, it also transmits the moisture and the temperature of the ground below it.

All of this leads to the number one reason electrostatic discharge (ESD) preventative flooring fails: moisture permeation.

Flooring Failure

When too much moisture moves through the concrete, it results in a high alkalinity in the concrete.  The higher pH levels react to the bonding agent, causing the adhesive in many instances to fail. And if that failure isn’t discovered, could even lead to mold between the concrete and the flooring.

A properly constructed system built recently should include a vapor barrier – a plastic shield that lessens the moisture transference of the concrete flooring. But older buildings may not include this and preventative measures should be taken.

The best and most economical solution is to install resilient flooring to the concrete base before laying down the adhesive backed ESD flooring. Resilient flooring is an organic floor surfacing material in sheet or tile form: rubbervinyl, cork, or linoleum are all viable options.

You can also apply a resin-based moisture barrier coating before laying down your ESD flooring tiles.

A more efficient method is to simply pour a static conductive water-based epoxy floor covering. This eliminates the need for an additional layer of ESD flooring as the epoxy itself provides the protection.

What you can’t do is nothing. Moisture-related floor covering failures are responsible for over $1 billion annually in damages.

Contact us today for more information; we would love to be your full service, seamless ESD solution provider.

20 Apr

How Do You Care for Your ESD Floor?

How to Care for Your ESD Floors

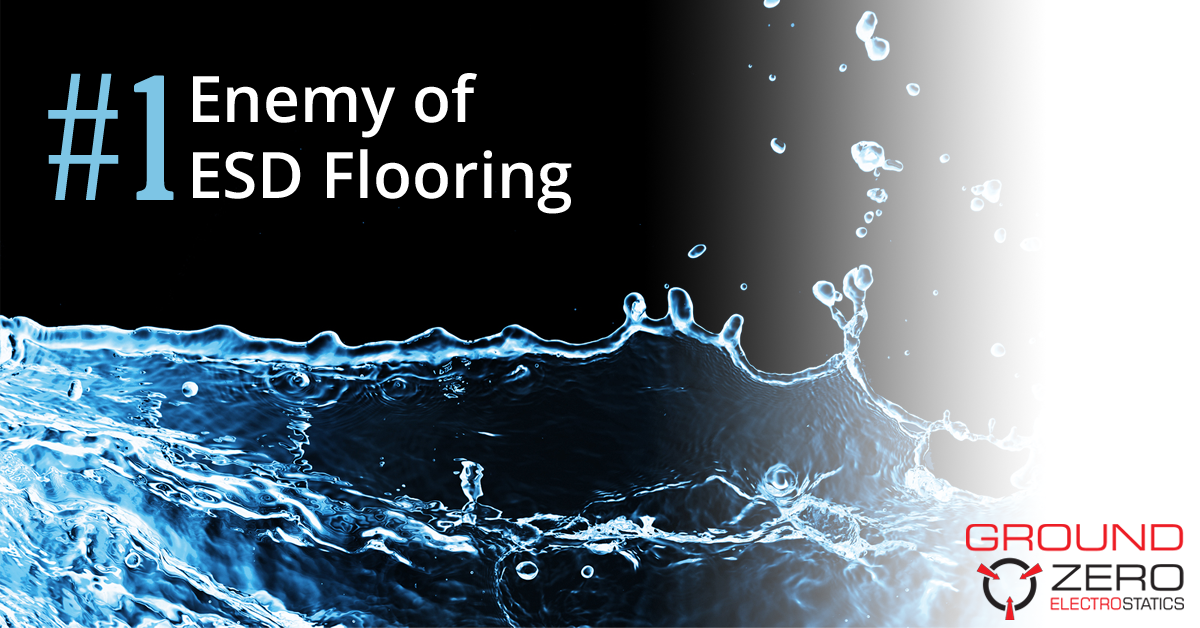
So you’ve finally got your brand spanking new Electrostatic Discharge (ESD) preventative flooring installed. It looks great, it works great. But how do you keep it that way?

You’re smart enough to know that just like this is a specialized floor, it requires specialized care. Not just any cleaning products will work. You certainly don’t want to void the warranty, or even worse, compromise the ESD properties of the floor. That could drastically escalate costs – replacement of the damaged electronics, replacing the floor itself – having to apologize to your clients and replace the electronics they trusted you to provide.

You can’t find anything in the installation instructions. You hear the boss’ voice around the corner, you know he’s going to ask these questions. You don’t have the answers. You look down and you’re not wearing any pants!

Well, we can’t do anything about your pants, but we do have some answers to avoid that other nightmarish scenario.

For starters, take a break – for the first 5 days following a new installation, don’t wash or machine scrub the floor. This allows the adhesive to properly bond with the concrete base, as well as to prevent excess moisture – the #1 enemy of ESD flooring – to interfere with the adhesive.

The First Steps

Once the first week has passed, do an initial maintenance cleanup. Sweep or dust mop the surface to clear it of all sand, grit, debris, or dirt. Then mix a neutral pH detergent with a small bit of water in a mop bucket.

Dip the mop in the solution and fully wring it out. It is important to ONLY use a damp mop. Do not flood the floor with cleaning solution. Use as little liquid as possible to clean the surface.

If needed, scrub the floor using a rotary scrubber with scrubbing pad or automatic scrubber with scrubbing pads. Again, using as little water as possible!

Use the wrung out mop or a wet vac to wipe up any excess cleaning solution. Carefully rinse the surface with cool, clear water, but not too much, and again vacuum or damp mop up the water and let it dry.

Never use standard floor wax or standard floor finish!  Doing so will destroy the floor’s ability to prevent ESD. A high gloss appearance can be achieved with a high speed buffing machine with an untreated polishing pad.

Daily Care & Cleaning – Two Options

For your day to day cleaning and upkeep, there are two standard approaches for ESD flooring. Both are viable, but for obvious reasons, we prefer the first method.

Safety First!

Always be aware that a wet floor is more slippery, and therefore more dangerous to personnel. Try to coordinate cleaning of the floor to the end of the workday when fewer people are around, put up appropriate signs, and always exercise caution to prevent workplace injuries.

The first step in either case is to sweep or dust/dry mop the surface.

Dry Maintenance Method (Option 1)

By limiting the amount of liquid your floor is exposed to, you stand they best chance of avoiding the #1 enemy of ESD flooring – moisture. The Dry Maintenance Method is a simple, single step process.

Spray clean or burnish floor using a 1200 – 1500 rpm rotary buffing machine with appropriate pads (usually white) and a spray buff solution containing water, alcohol and a pH neutral detergent.

If heavy cleaning is necessary use a more concentrated pH neutral detergent and a brown pad.

Wet Maintenance Method (Option 2)

Similar to our initial cleanup procedures following installation, the wet maintenance method uses a damp mop and a cleaning solution that includes a neutral pH detergent.

If the floor is exposed to grease or oil, a pH neutral, citrus-based degreasing detergent may be used.

Scrub with rotary scrubber with scrubbing pad or automatic scrubber with scrubbing pads. Again, do not flood the floor with solution, water or any liquid.

Wipe up the solution with a damp mop or wet vac.

Carefully rinse with clean cool water, wipe it up, then let the floor dry (generally overnight).

Two final notes:

Several times we’ve mentioned using a pH neutral detergent. While there are many options, we highly recommend the industry standard – ZeroStat products. They can be purchased through our site or any reputable supplier of ESD preventative products.

Earlier, we recommended not using a standard floor wax. While there are professional ESD waxes available from ZeroStat that maintain the ESD preventative properties of your flooring, even those waxes generally cut five to ten tears off the life of your ESD floor and should be used with caution.

We would love to be your full service, seamless ESD solution provider.  Contact us today for more information.

12 Apr

What Are ESD Mats & How Do They Work?

Static Electricity and ESD Matting

Have you ever been working in your garage and accidentally made contact with a metal part of an ungrounded electrical appliance, like a box fan or a badly wired junction box? The jolt you receive wakes you up faster than a cup of coffee or one of those 5-hour energy drinks. Now imagine what that could do to sensitive electronics—devices and circuit boards with a much lower resistance than your skin.

Considering just the physical activity of moving your arms and legs can build up relatively large electrostatic discharges (ESD) that we may never notice, there’s very little activity that isn’t dangerous to electronic components – even their assembly. But there are steps you can take and tools that have been developed to protect your sensitive electronics. One simple, popular tool is an antistatic or ESD mat.

How Does an ESD Mat Work?

Antistatic or ESD Mats have a high electrical resistance, which allows the electrostatic discharge to “flow” across the surface of the mat at a slow rate – enough to get the ESD away from your electronics, while at the same time neutralizing what little charge inevitably does build up.

The simplest form of an ESD mat is simply that – a tabletop mat, about the size of a placemat, that you use on a desk, table or any flat surface. They typically connect with a personal grounding wrist strap – adding additional protection by drawing any ESD charge away from the person working on the device.

ESD mats also use a common ground to draw the electrostatic discharge away from offending areas. Without that ground, the mat could, in theory, protect the item being worked on at first, but would then transfer the ESD to the very next thing it comes into contact with – the next item, the person holding it (and then to the item), or even right back onto the item it was originally meant to protect.

For larger workspaces, or dedicated ESD workstations, you can invest in rolls of ESD matting or custom-sized mats. You can even get ESD matting with built-in static control monitors and self-adhesive backing.  Just make sure, regardless of the size or quantity used, that all of the mats are grounded.

You can also increase protection as well as worker safety by investing in ESD flooring mats, which not only act as further neutralization of potential electrostatic discharge but also can provide cushioning, easing the fatigue of the person standing while working on the electronic devices. The hazard of slippery floors is also alleviated by an ESD flooring mat.

Bear in mind that not all ESD matting is tested to the same level.  We recommend checking to make sure the mats you are buying are properly assessed to ensure you are getting the protection you need, and ideally, include ISO certification for your company’s protection.

We would love to be your full service, seamless ESD solution provider.  Contact us today for more information.

05 Apr

The Truth About 11 Myths of Electrostatic Discharge: Part 2

11 Myths of Electrostatic Discharge

Last week we shared with you Part 1 of The Truth About 11 Myths of Electrostatic Discharge; here’s Part 2…

Myth #6 – An ESD bag is all the protection I need.

There is a somewhat popular belief that you can use the ESD shielding bag that your circuit board or sensitive electronics was shipped in as adequate “matting” when you are working. This could not be more false.

Regardless of which ESD shielding bag you receive or purchase, it ONLY provides ESD protection while the item in entirely enclosed inside a sealed bag. Outside of the bag, it can actually increase the chances that you will generate an ESD event, because the bag is designed to “push” a charge away from the contents of the bag – right into your electronics.

Myth #7 – Grounded metal offers a safe haven from ESD.

In fact, conductive materials – like metals – are not safe surfaces for sensitive electronic components that could be subject to an electrostatic charge, even if they are grounded. In fact, the charge dissipation is so fast, the resistance to ground has almost zero impact.

The point of grounding is to get everything at the same potential energy level so that current from an ESD can’t flow where it shouldn’t.  Using metal, even grounded metal, voids this effort.

The next three myths are similar in nature…

Myth #8 – Circuit boards without complementary metal oxide semi-conductor (CMOS) are safe.

On its face, this seems obvious, as it is hard to find a circuit board without some CMOS components. However, ALL circuit boards are susceptible to electrostatic discharges and the damage they can cause.

Myth #9 – A printed wiring board (PWB) permanently protects a circuit board.

Just because a component is inserted into a PWB, that does not protect it from potential ESD damage. It does decrease the likelihood that fatal loss will occur, as the voltage the entire board can sustain is increased.

But this is by no means a guarantee of safety. All proper precautions must be taken when handling sensitive electronics.

Myth #10 – Once products are mounted on circuit boards, ESD mishaps cannot occur.

This is similar to the above myth.  But unlike PWB boards, unprinted boards can actually leave sensitive components even more vulnerable because there is less resistance to slow the electrostatic discharge down.

 Myth #11 – Small companies cannot afford proper ESD protection.

On the contrary, small companies cannot afford not to have suitable ESD protocols and tools. The risk of damage and the costs associated with it are just too excessive not to invest in the proper implementation of an ESD protected workstation – even a portable one, if need be.

We recommend at a minimum, personal grounding wrist straps, dissipative ESD matting and grounding cables.

We would love to be your full service, seamless ESD solution provider, no matter what your size or budget.  Contact us today for more information.